

Crochet Sweater with a hoodie, Oversized Textured Hooded Sweater Pattern

It is time for another fun and cozy sweater. Made with a 100% nylon yarn which is the fluffiest… is that a word? Oh well if it isn’t I just made is up.the fluffiest yarn I have used. Anyway, this pattern is fun and easy with minimal shaping, It is literally two big rectangles seamed together and tiny detail for the sleeve before the making a cuff. The yarn so fluffy and fuzzy so the stitch definition is not that great. It can be tricky when watching a video but stitches are visible when crocheting with a naked eye.
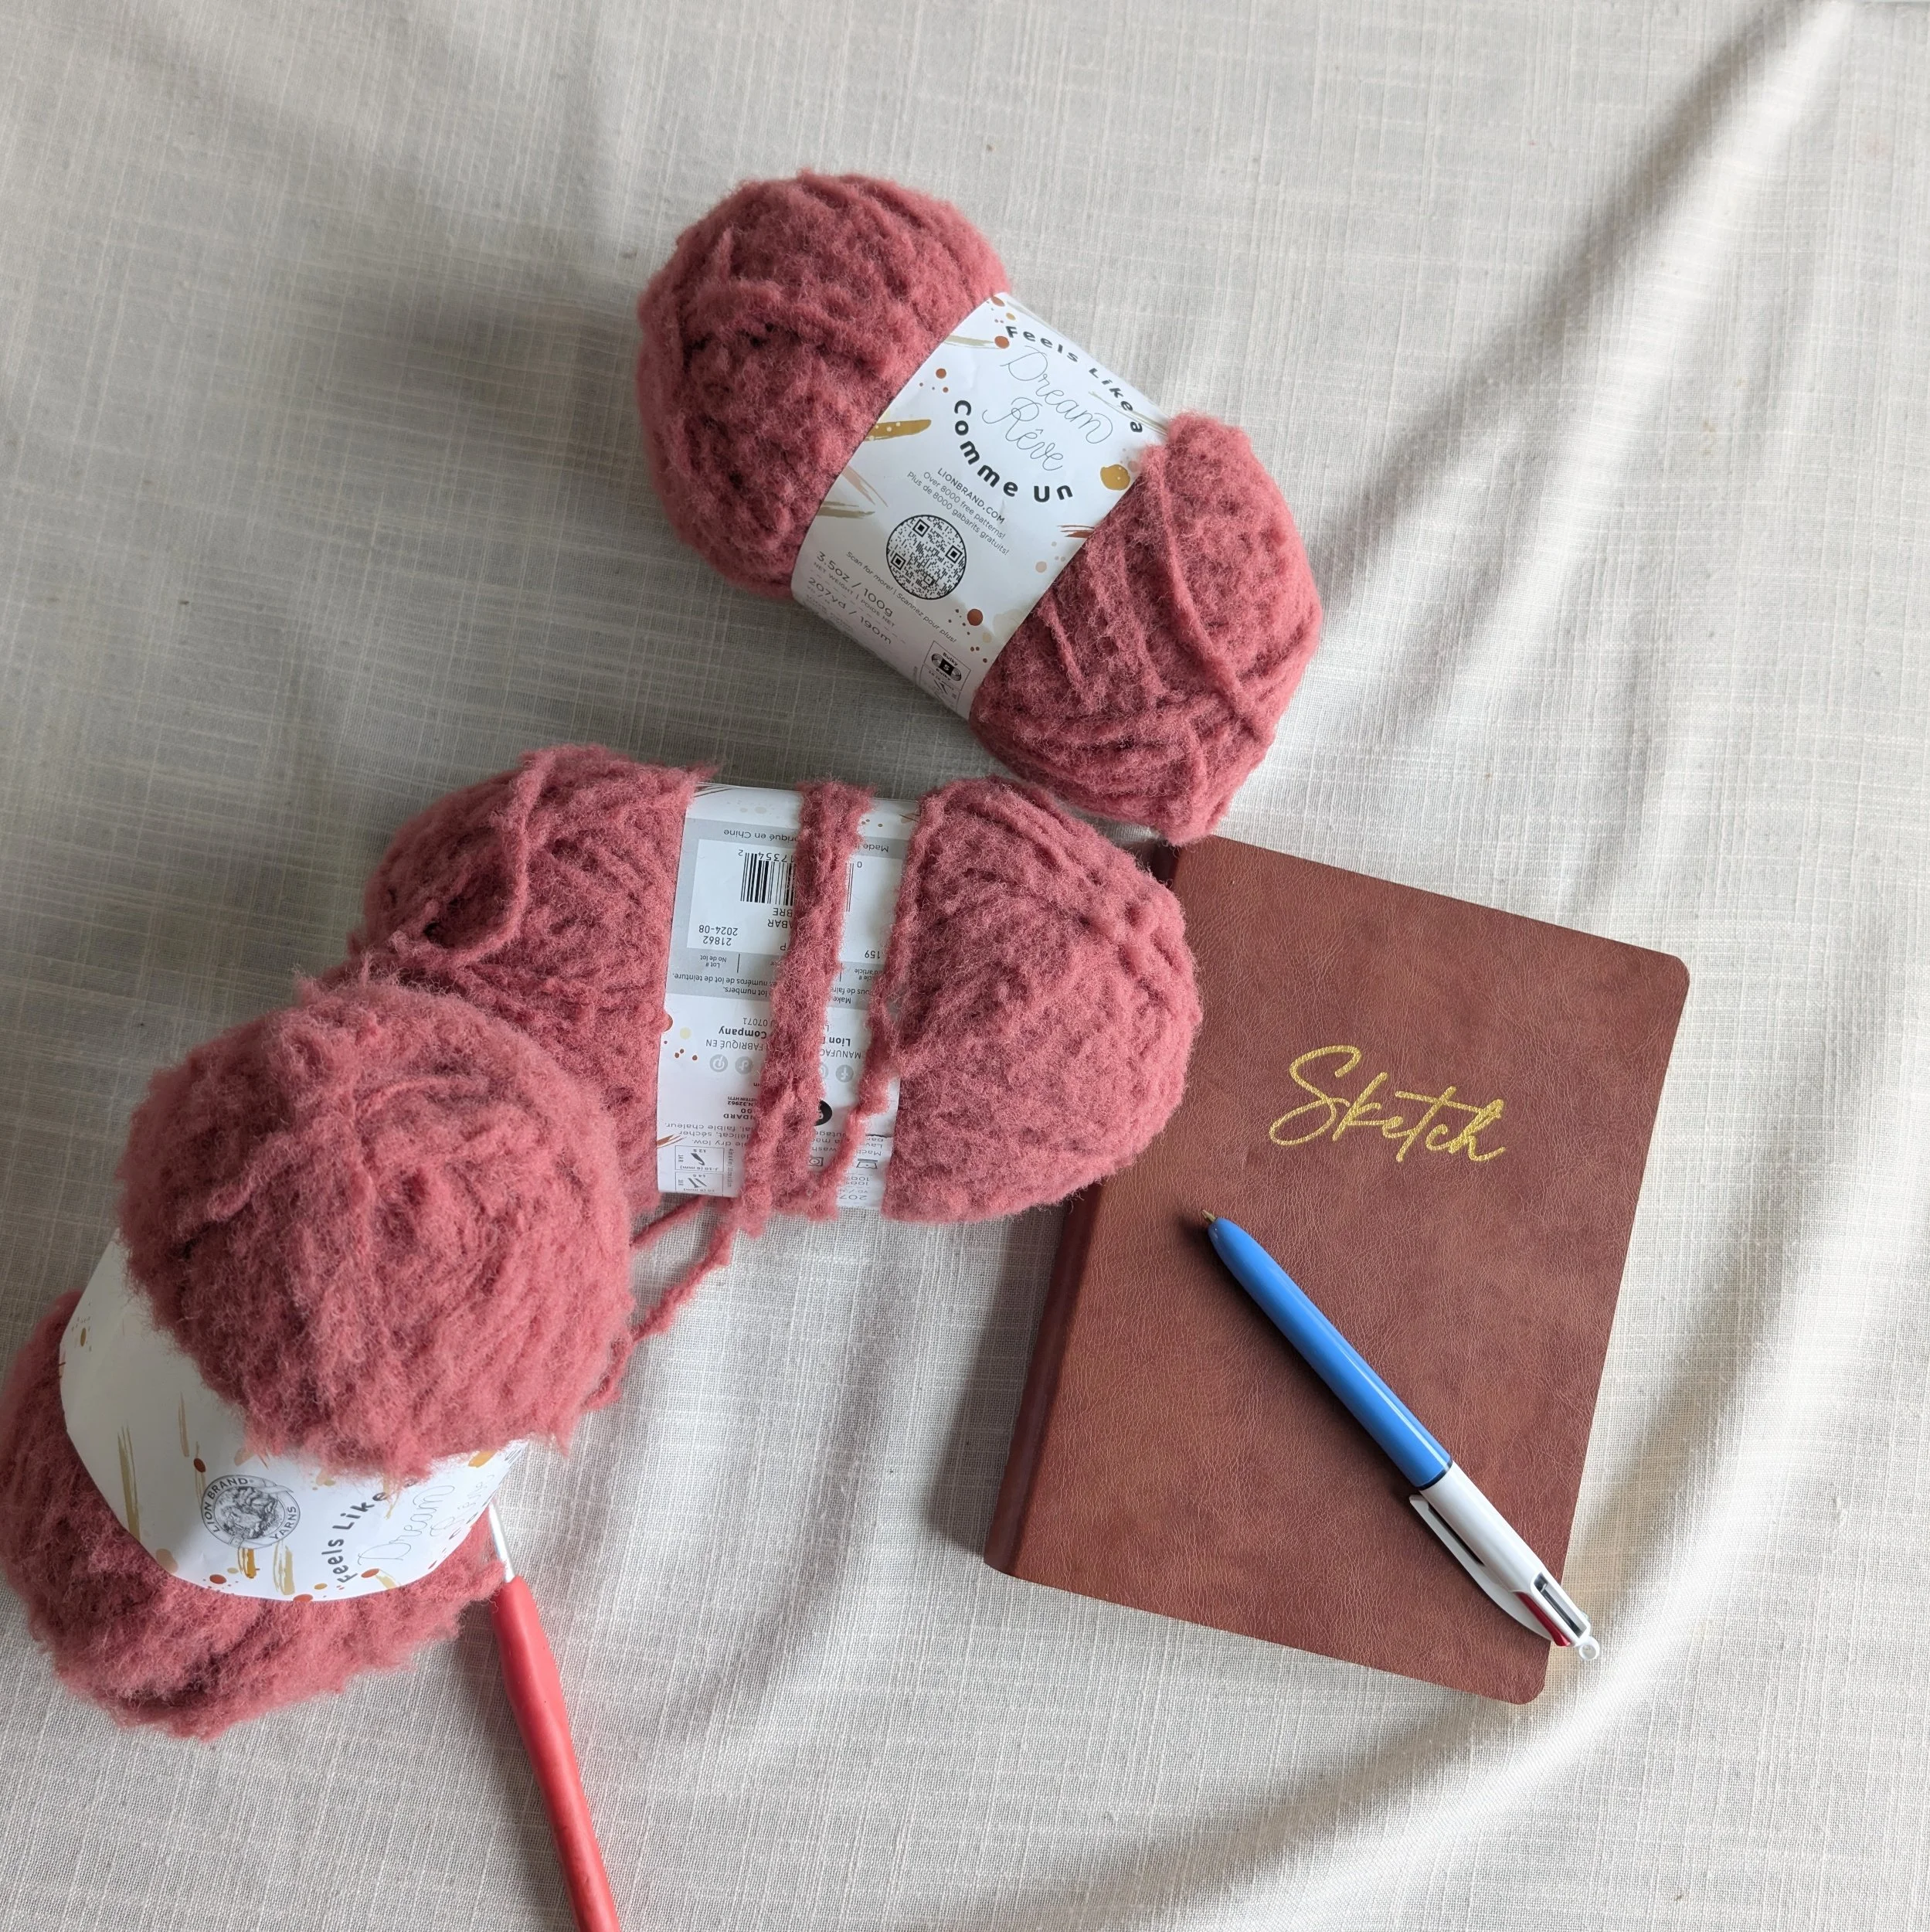
This yarn is from LionBrand called Feels like a dream and it is living up to its name. My favourite part of the the yarn is that even thought It is a weight 5 yarn, it does not feel heavy at all. This could be a year around sweater due to the characteristics of the yarn. The sweater will be perfect for the cooler weather at night when you out camping around the bonfire.
I think these yarns would be a great substitute for this project.
Disclaimer
This page contains affiliate link to product I use and love.If you click and purchase, I receive a small commission at no cost for you.
Before we begin, here is a video of step by step of how to make this beauty!!
Construction
The sweater is designed with four inches of positive easy to give it a trending look of oversized sweater. It is made up of two panels, back panel is essentially a rectangle. Front panel is similar to the back panel with the same length, the difference is the neck opening.
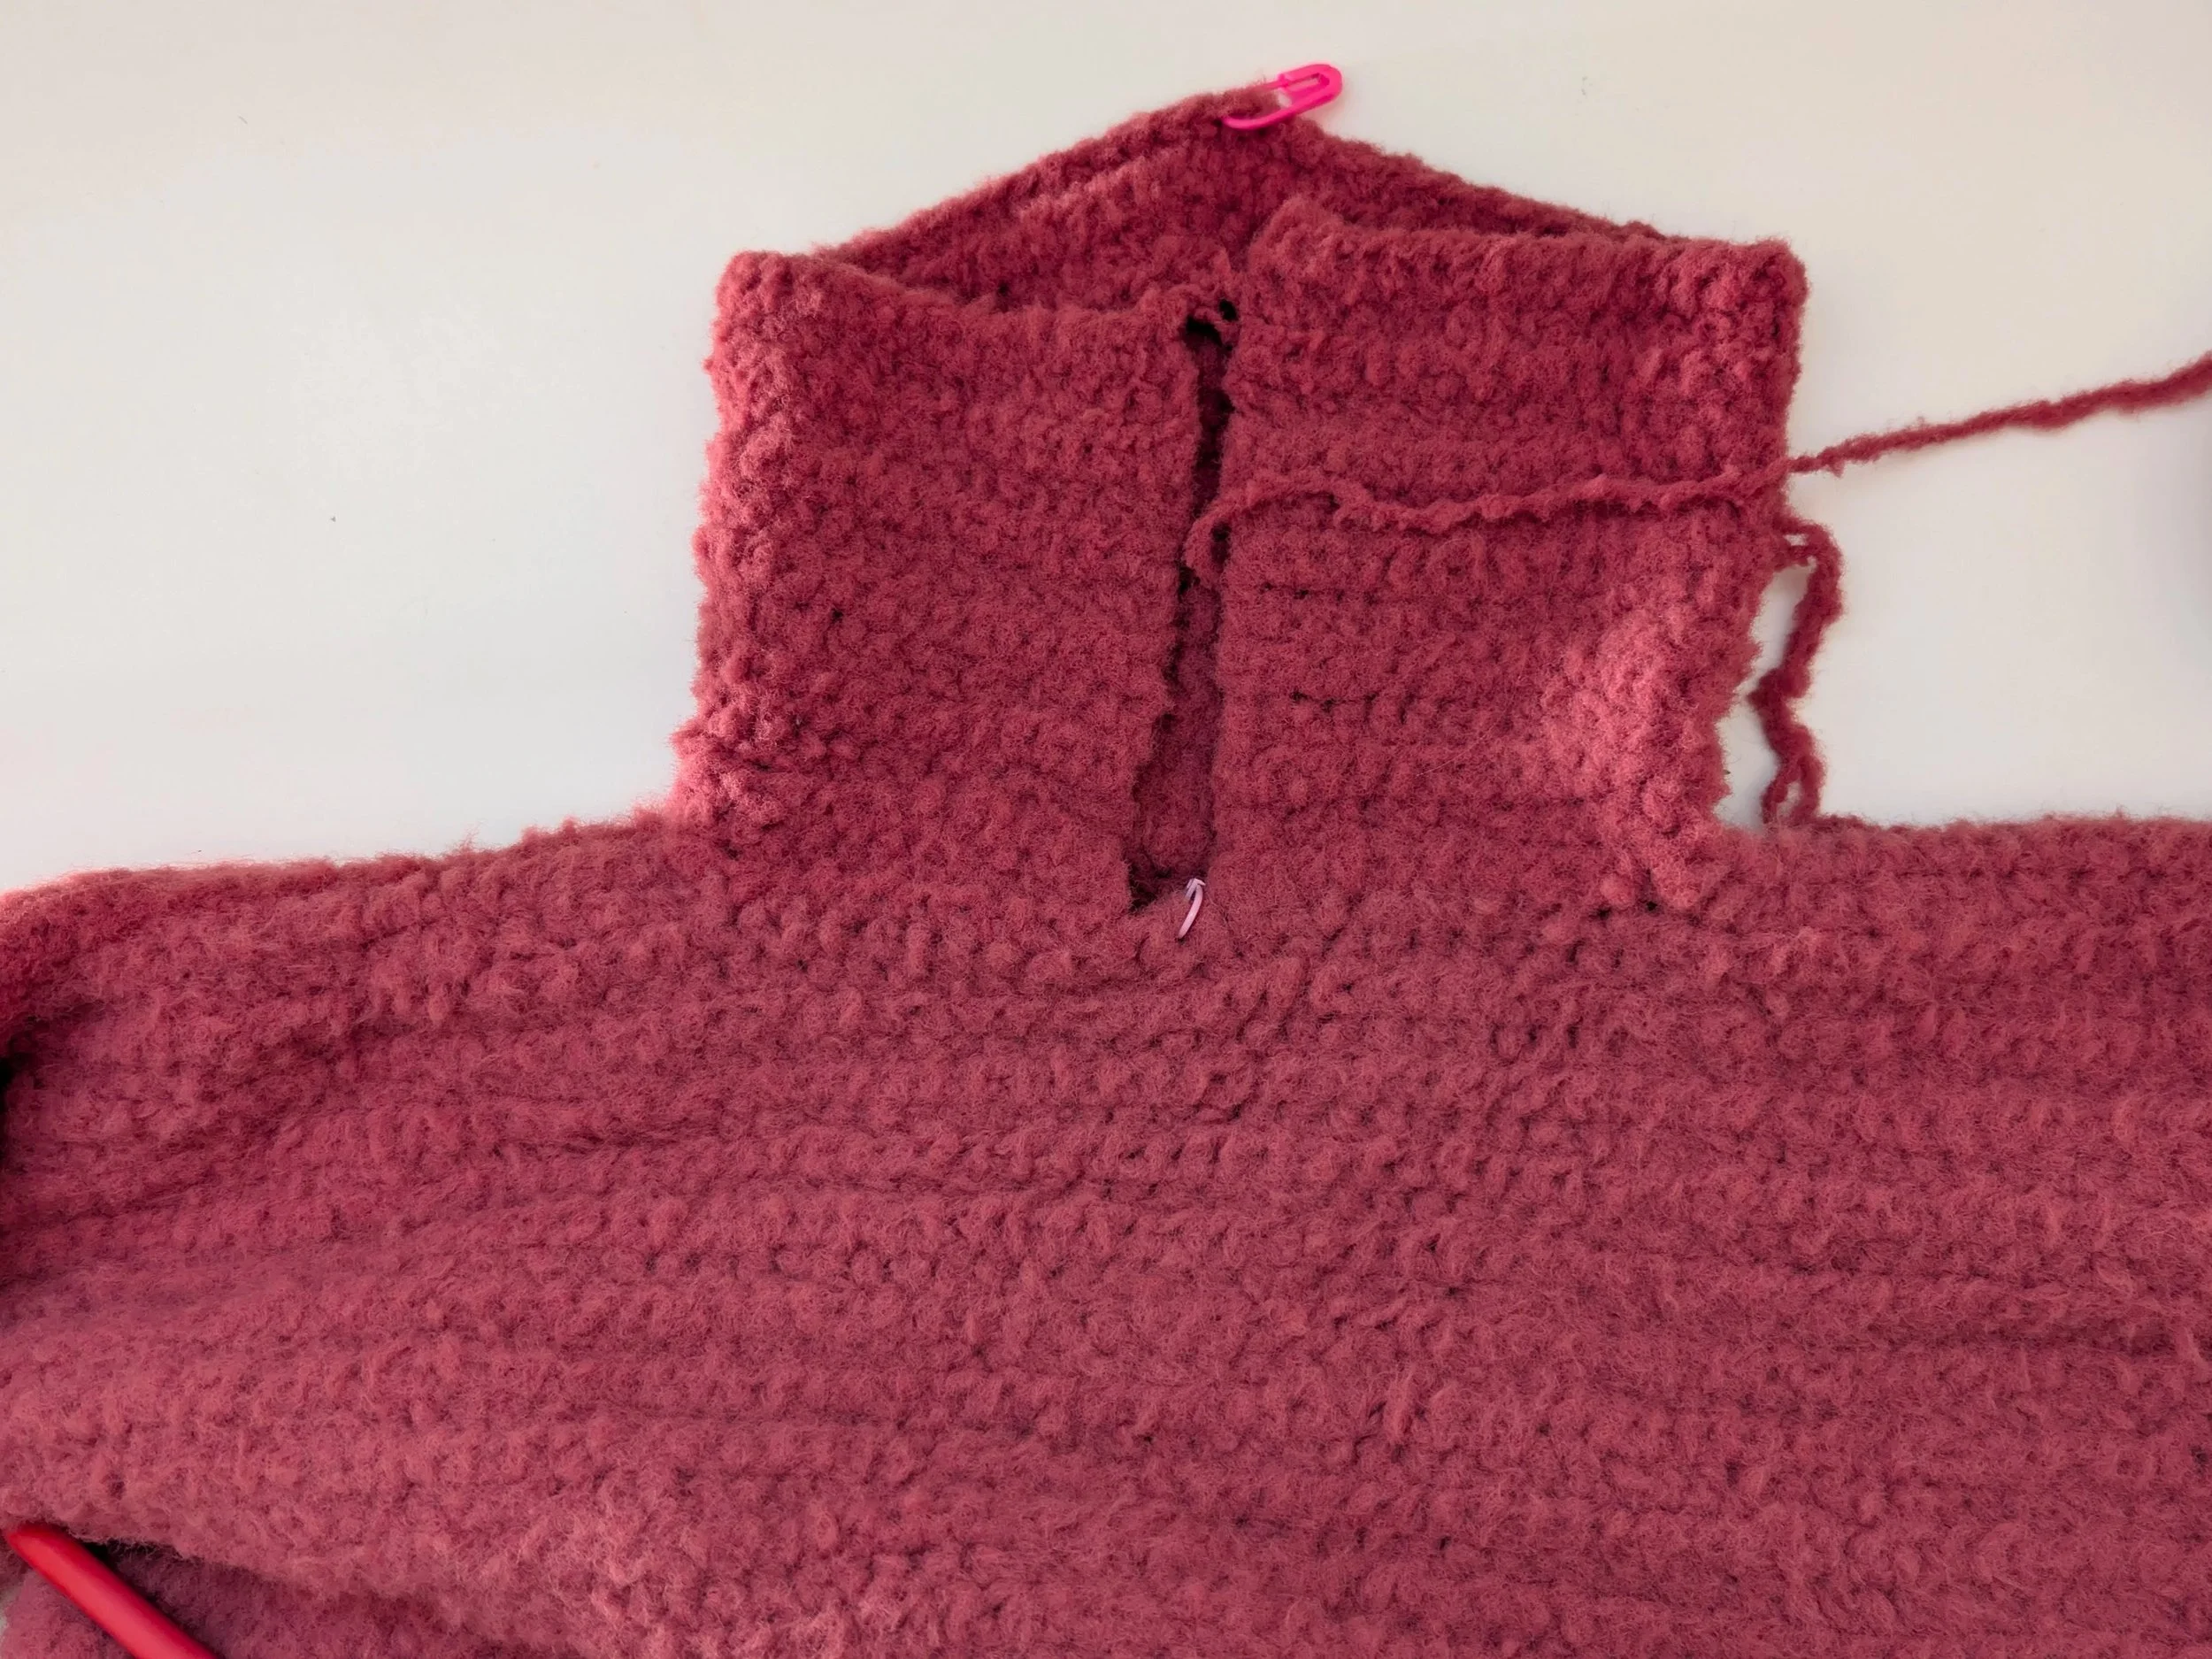
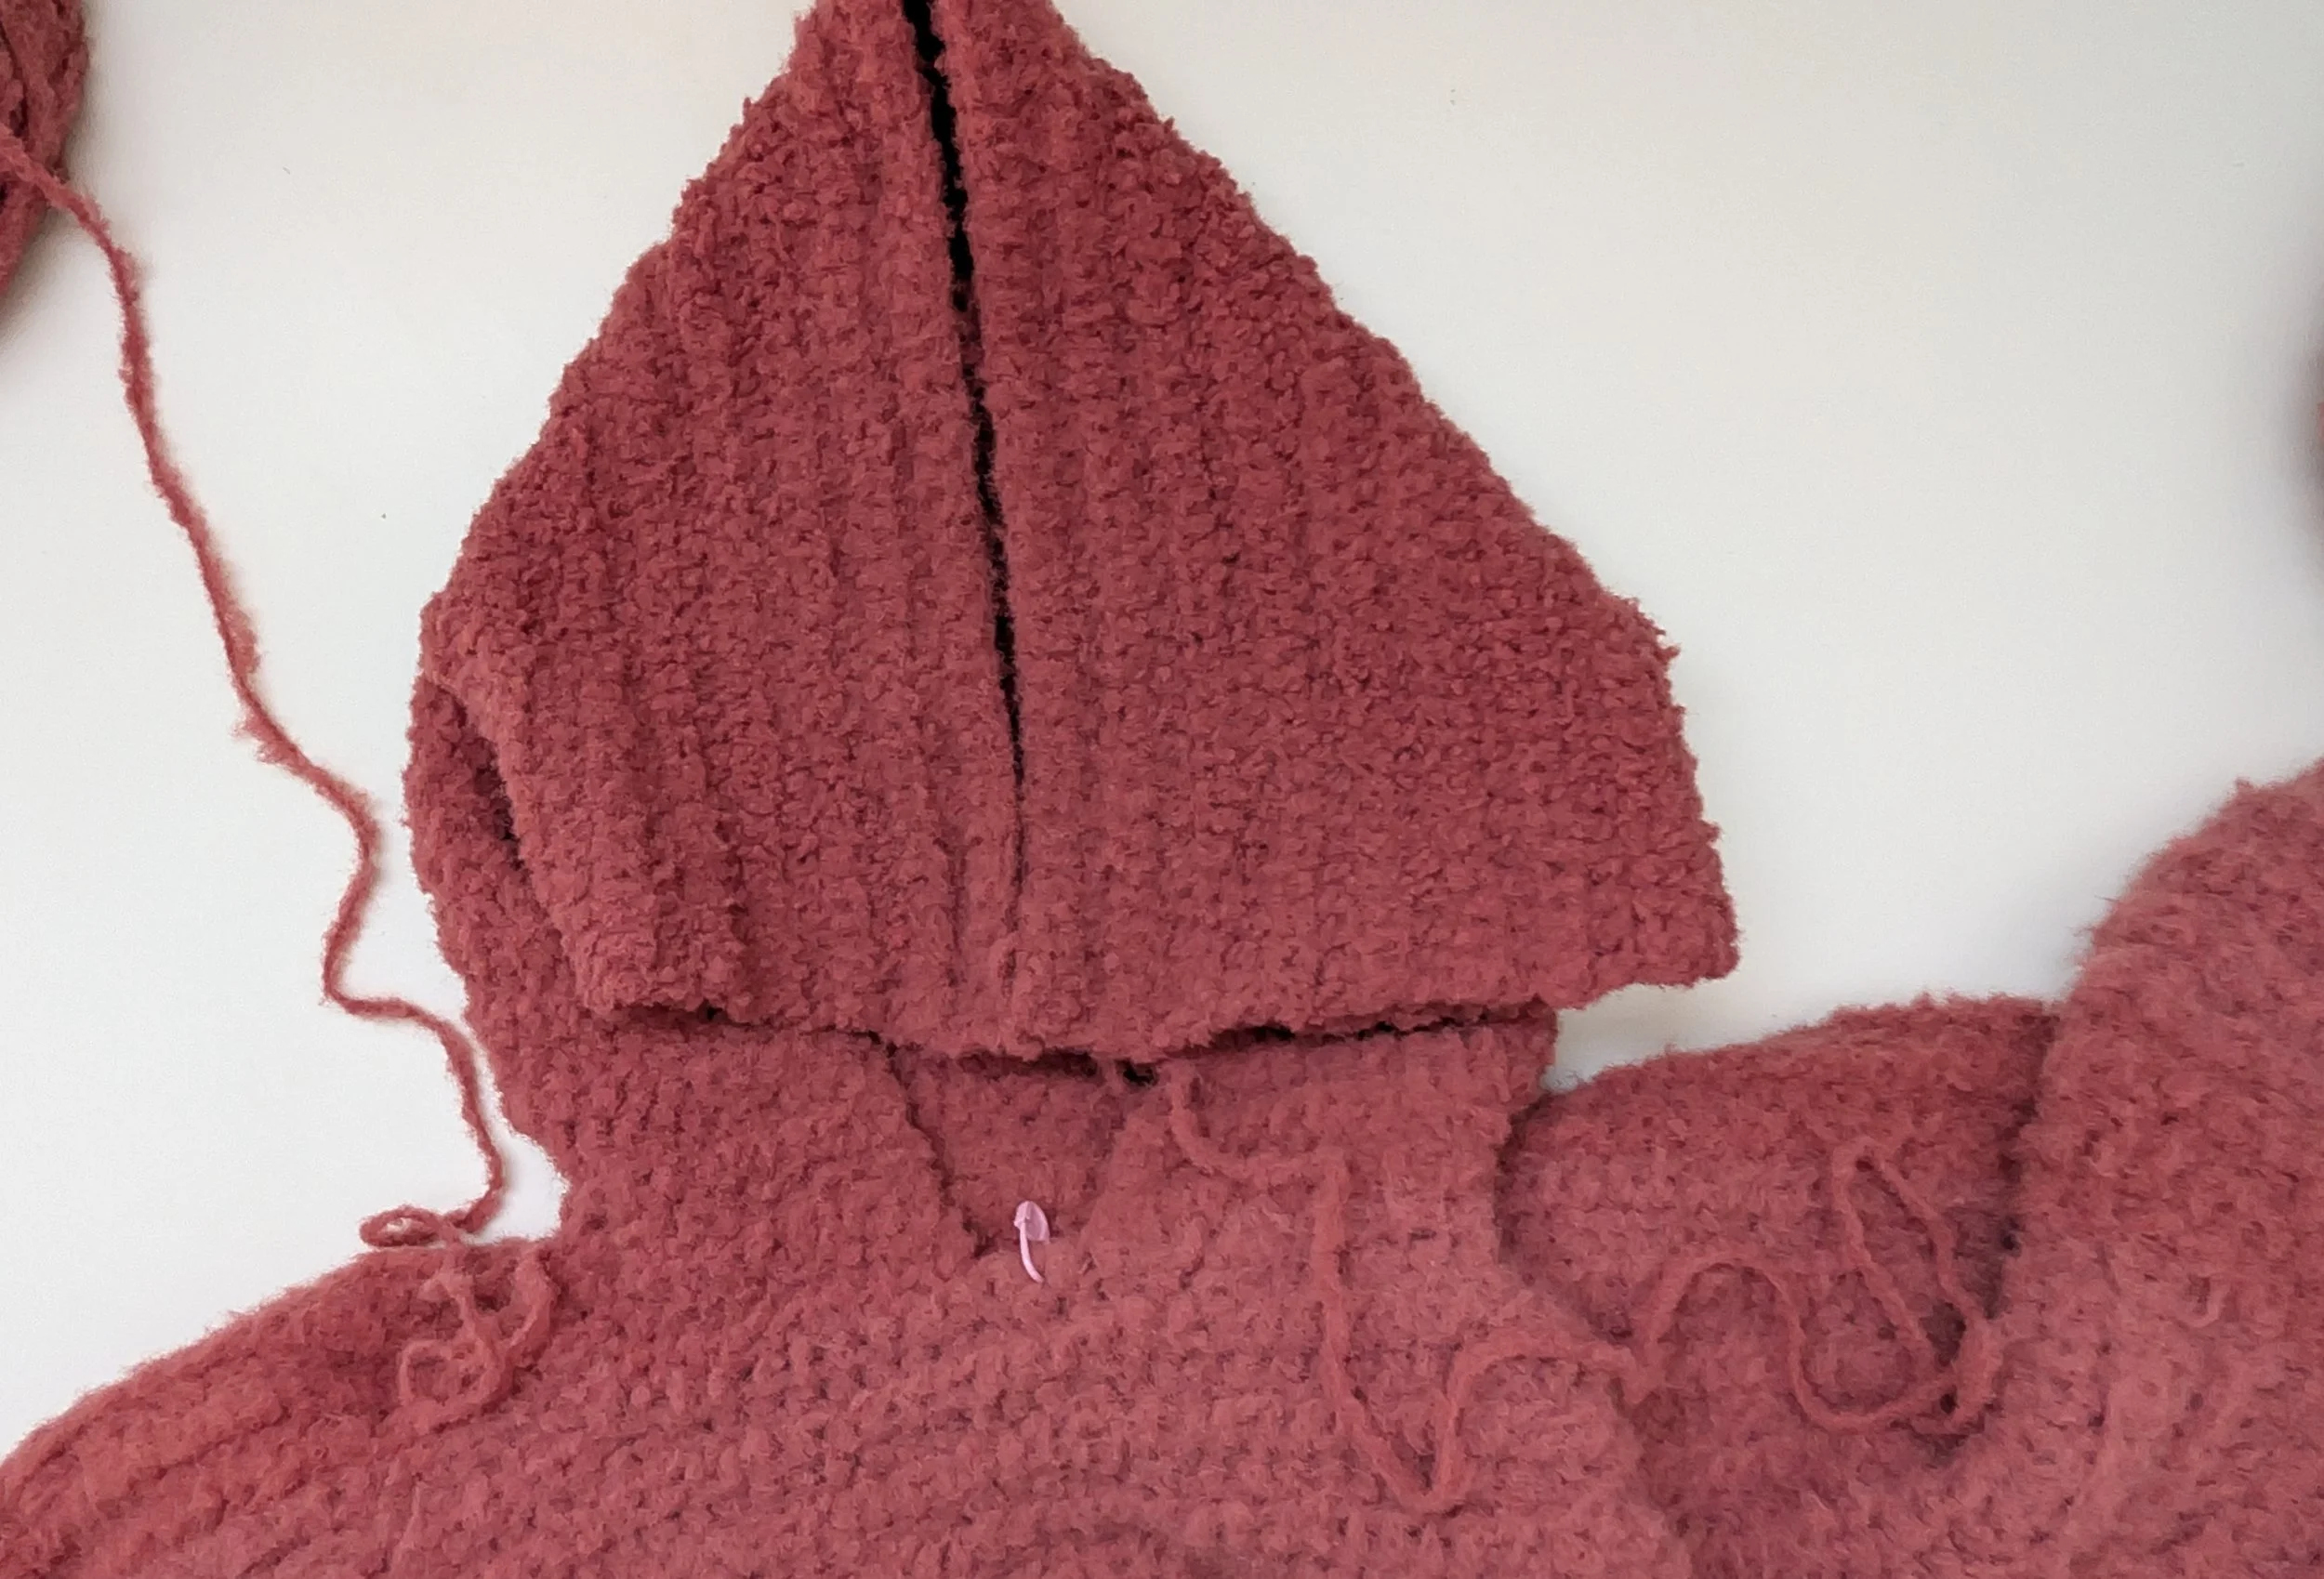
Sleeves are made top down with tapering at the bottom before adding a cuff. All the parts are seamed together before moving to the hoodie. Hoodie is made by joining yarn from the centre of the front panel and going back and forth for few rows, it measures roughly 14 inches in height. The hoodie is then designed to create a depth for the head to comfortably be covered. The back of the hoodie is marked with a stitch marker to identify where to add an extra stitch for approximately 10 inches from the base of hoodie. The last 4 inches is made with no increases then seamed on top to close it up
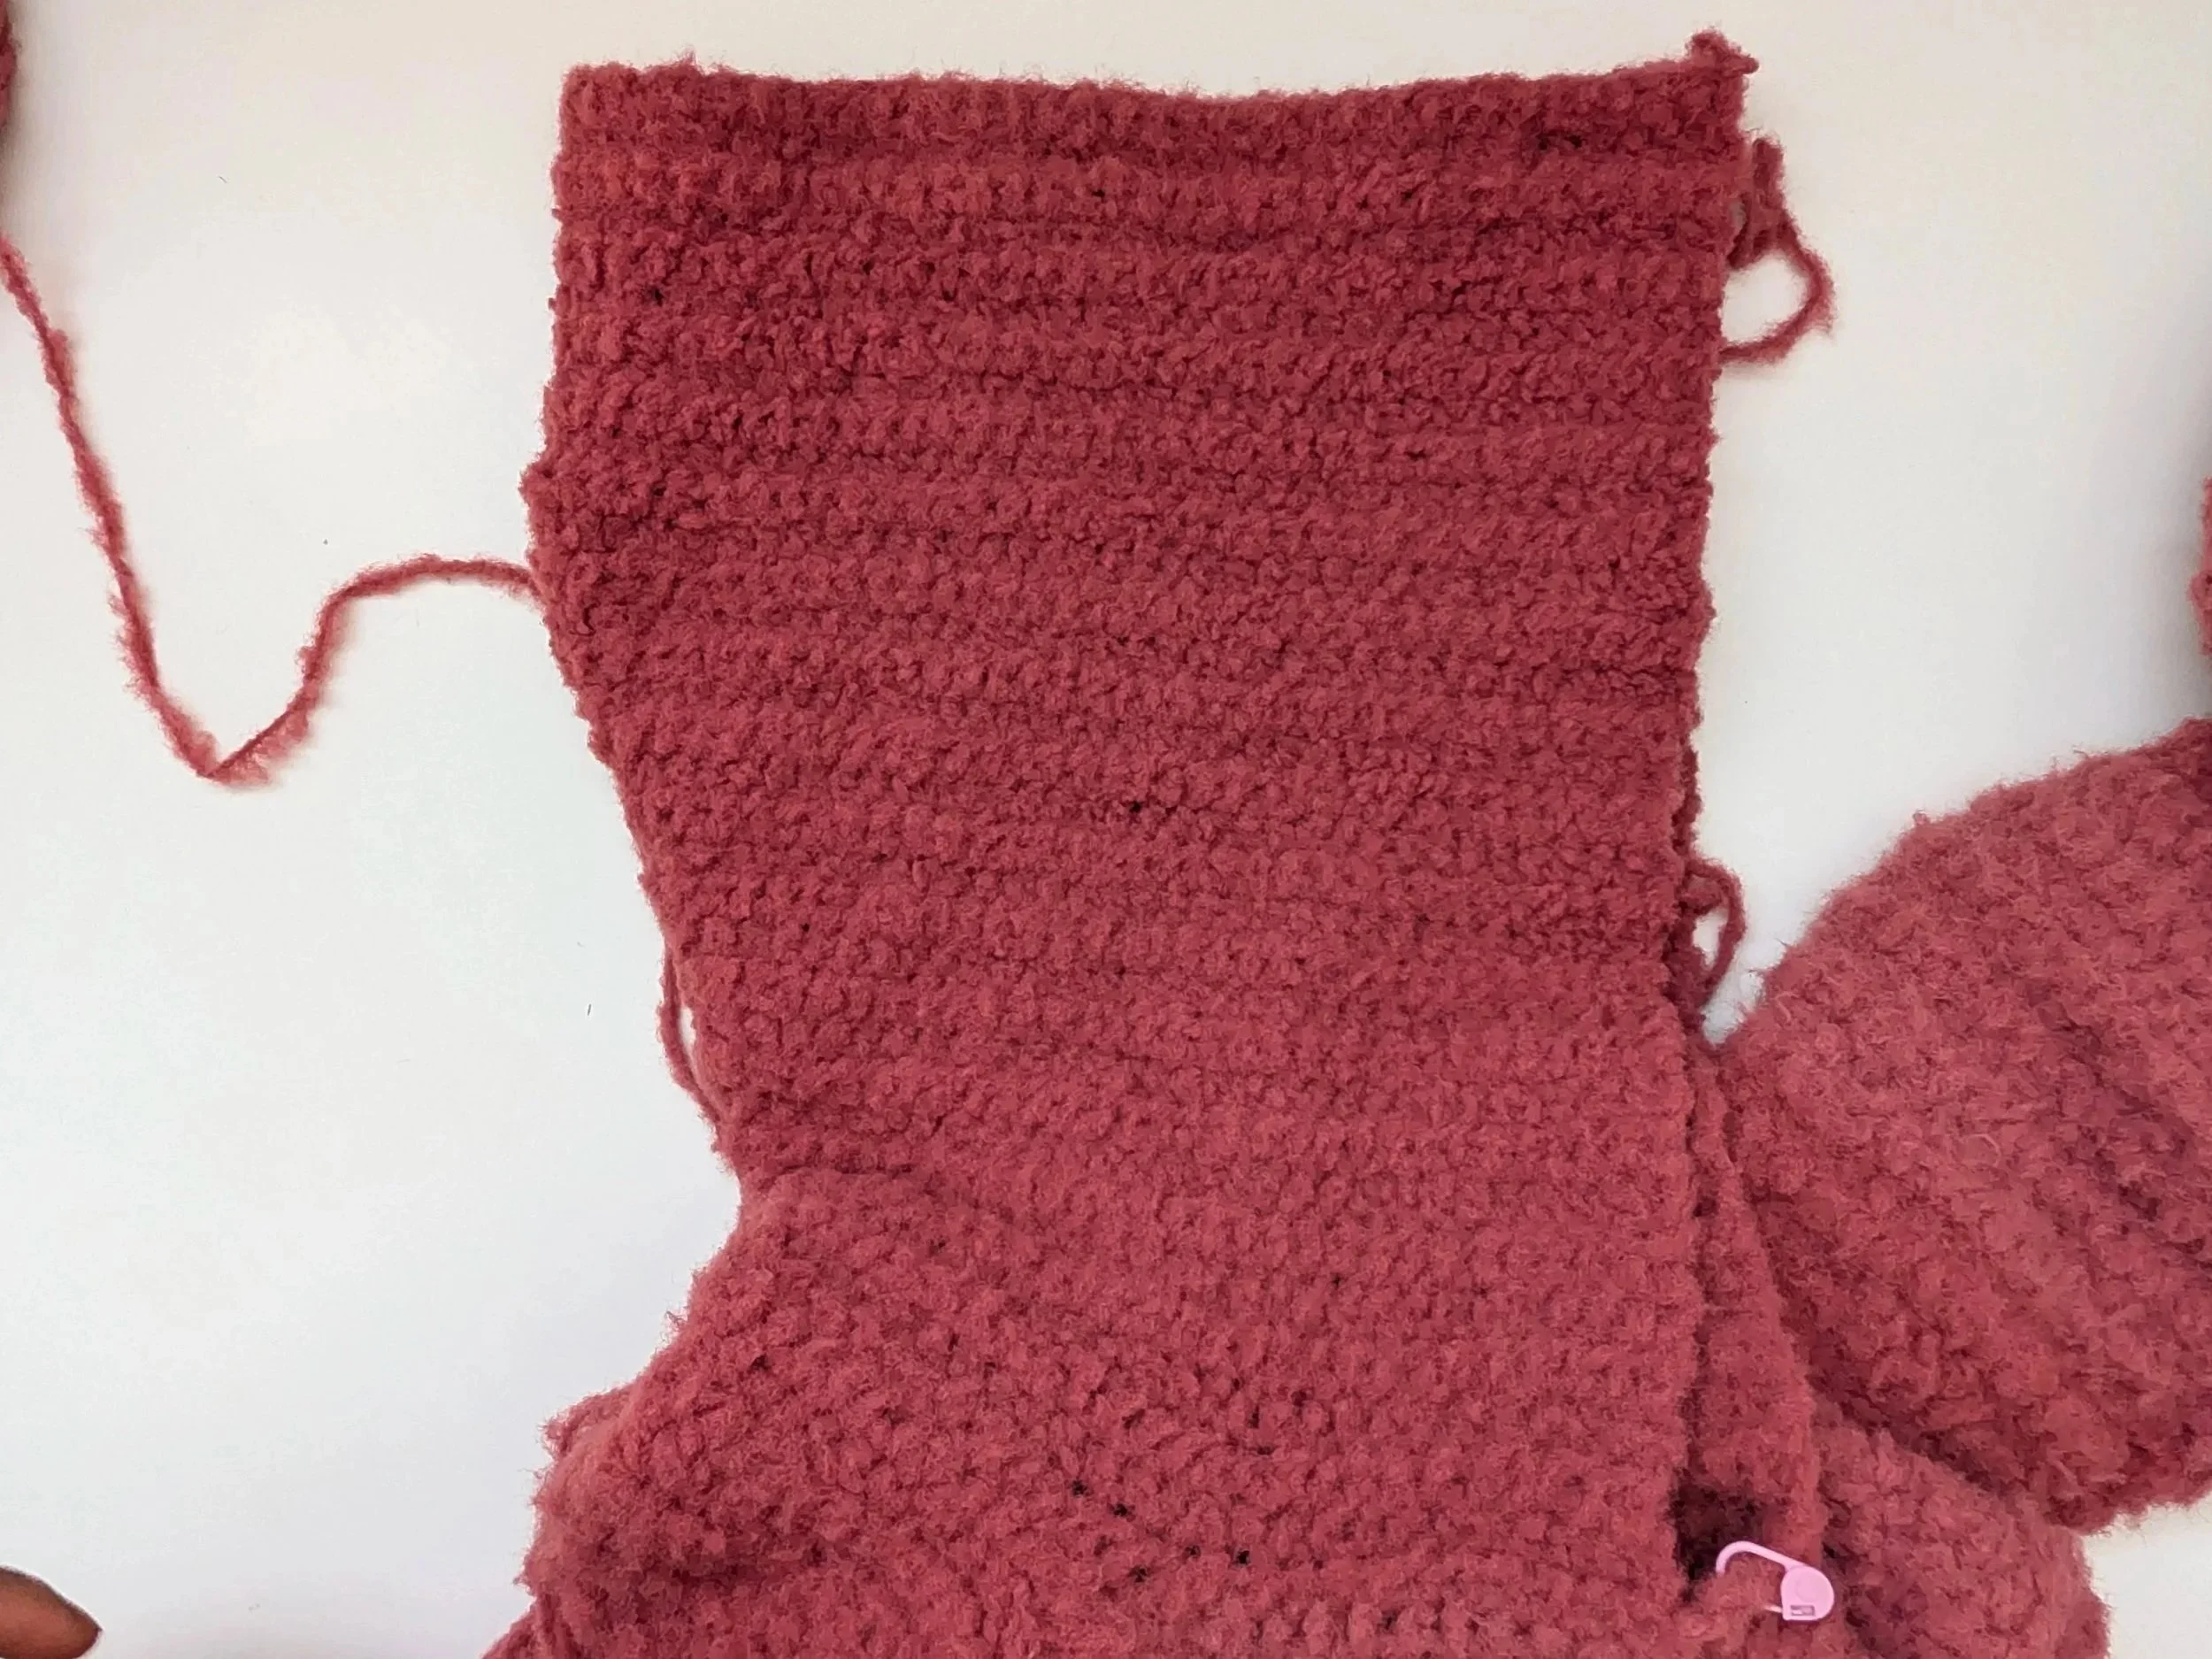
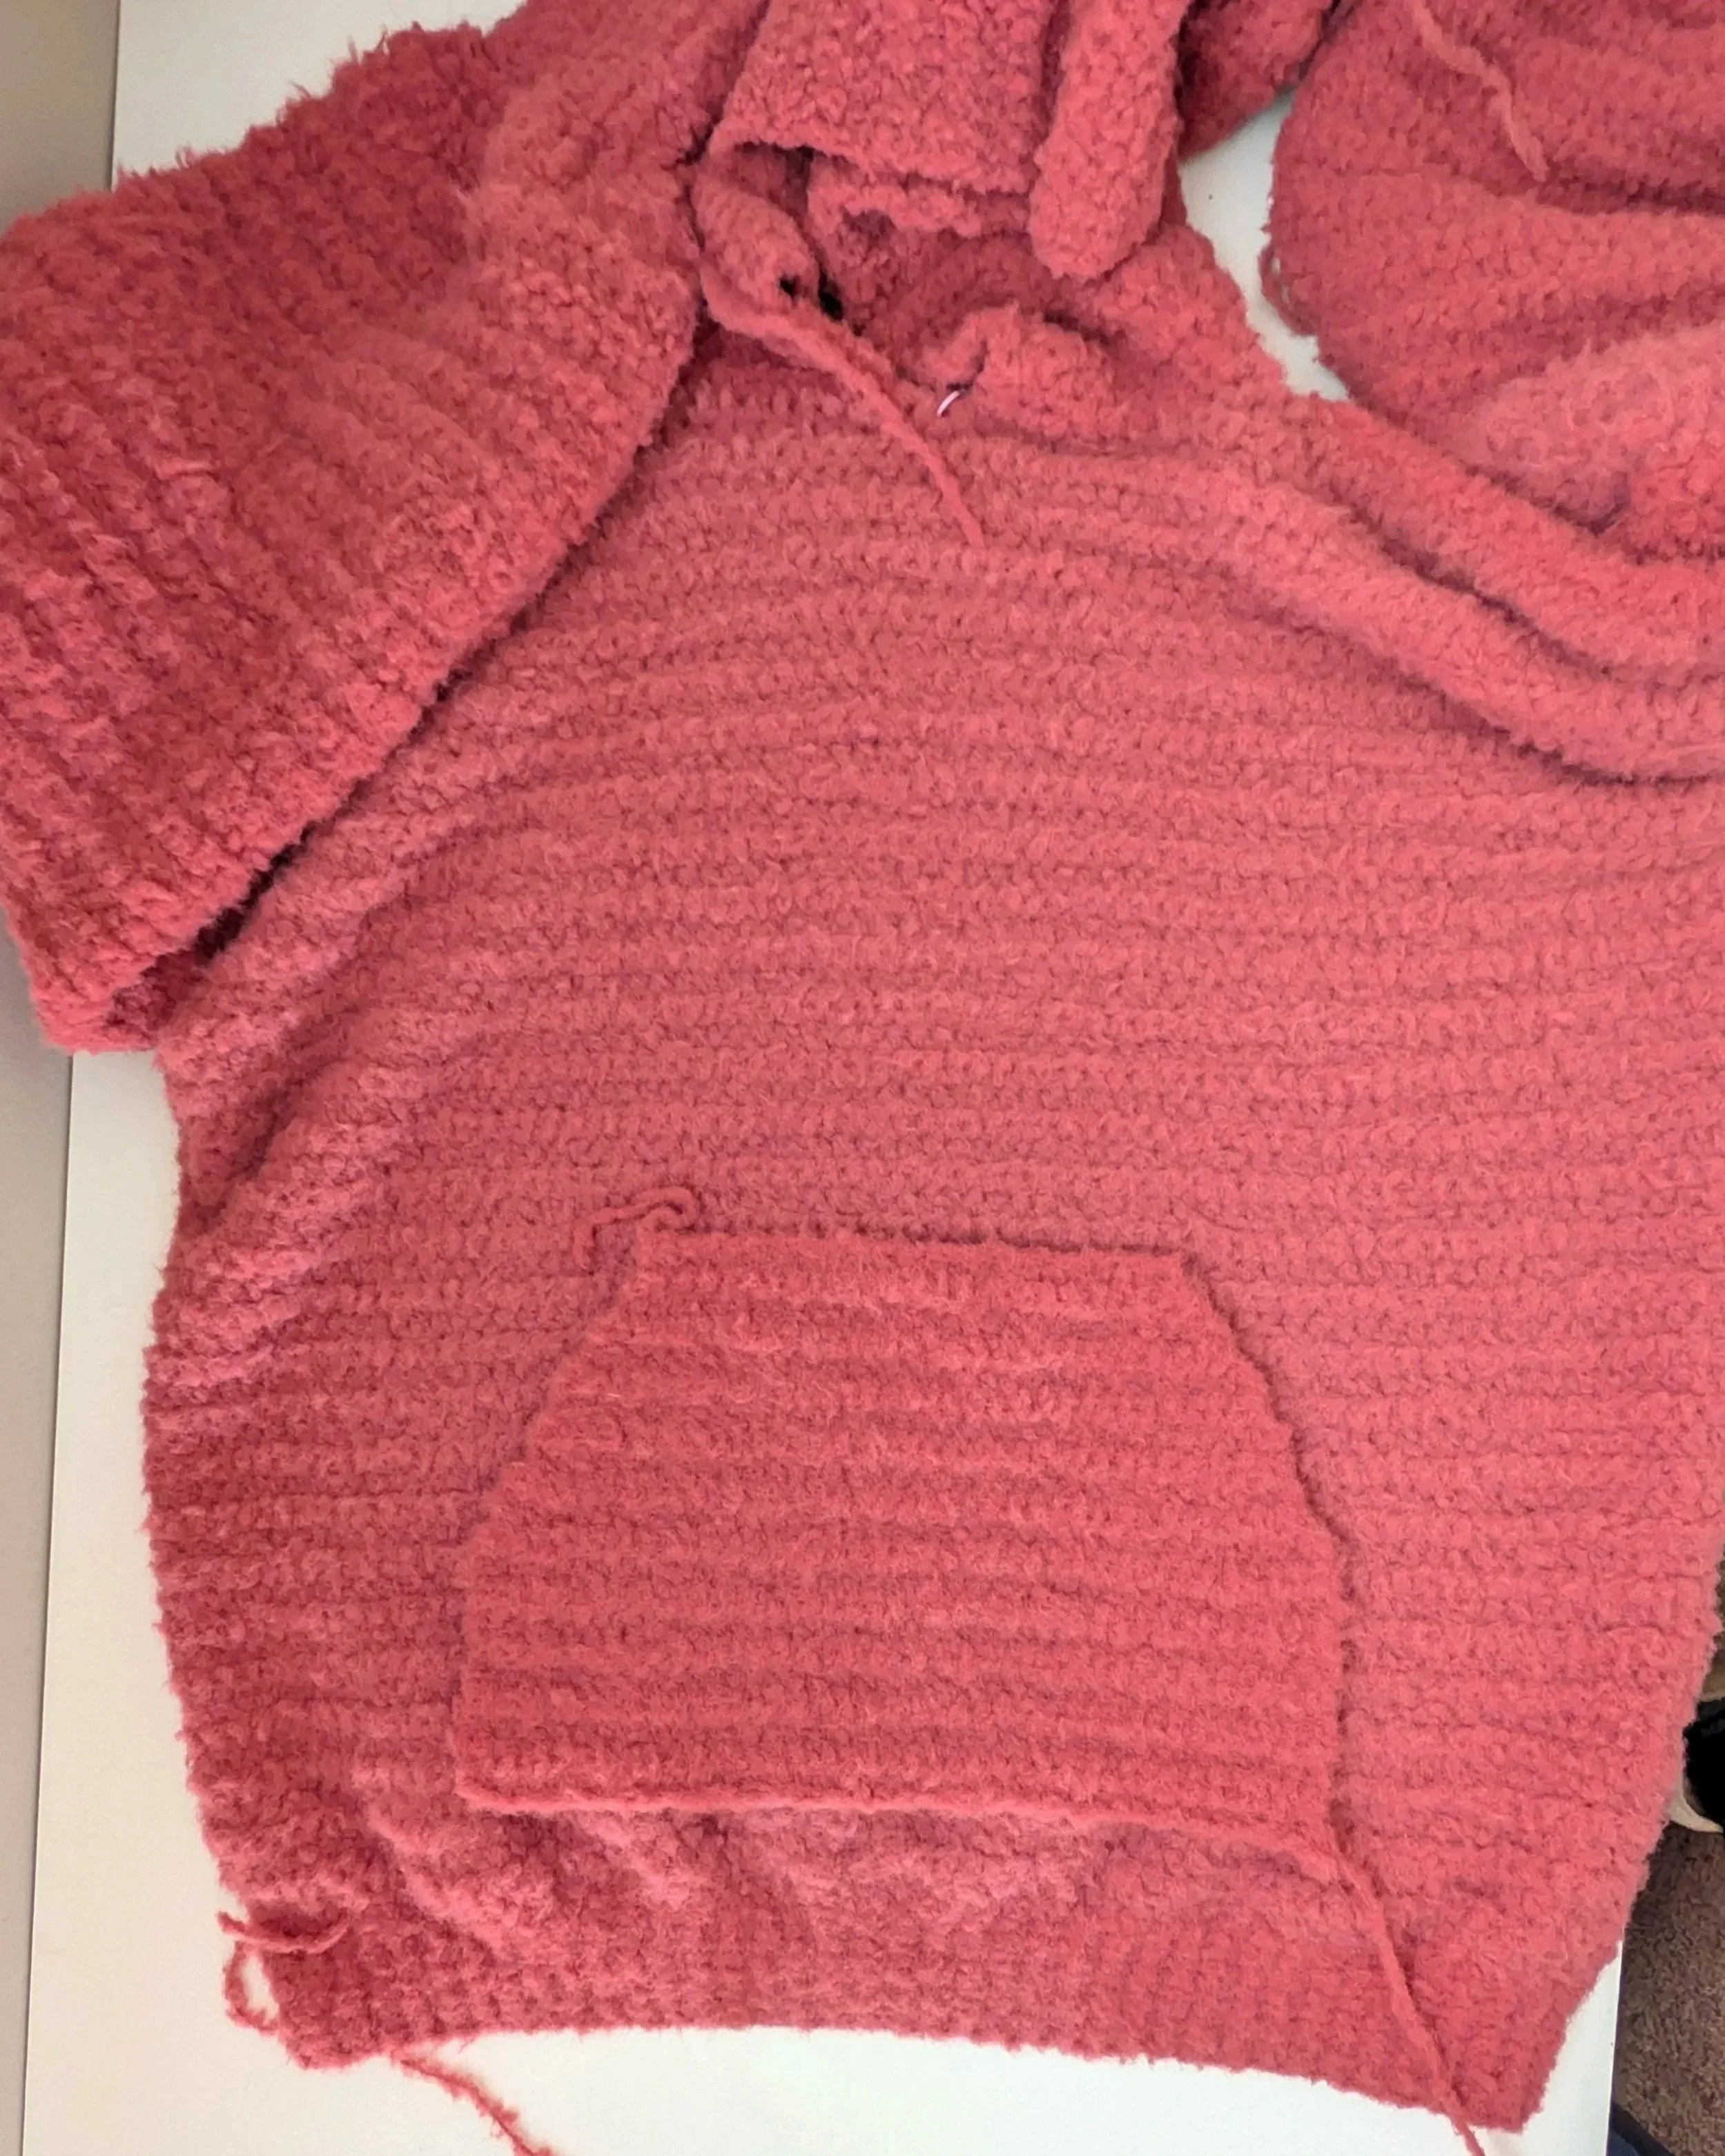
The bottom ribbing is then added and pocket later. The pocket is made last before seaming it to the front panel. Positioning of the pocket is important. It has to be placed in the middle of the sweater, ensuring that you have the same distance on either side of the panels
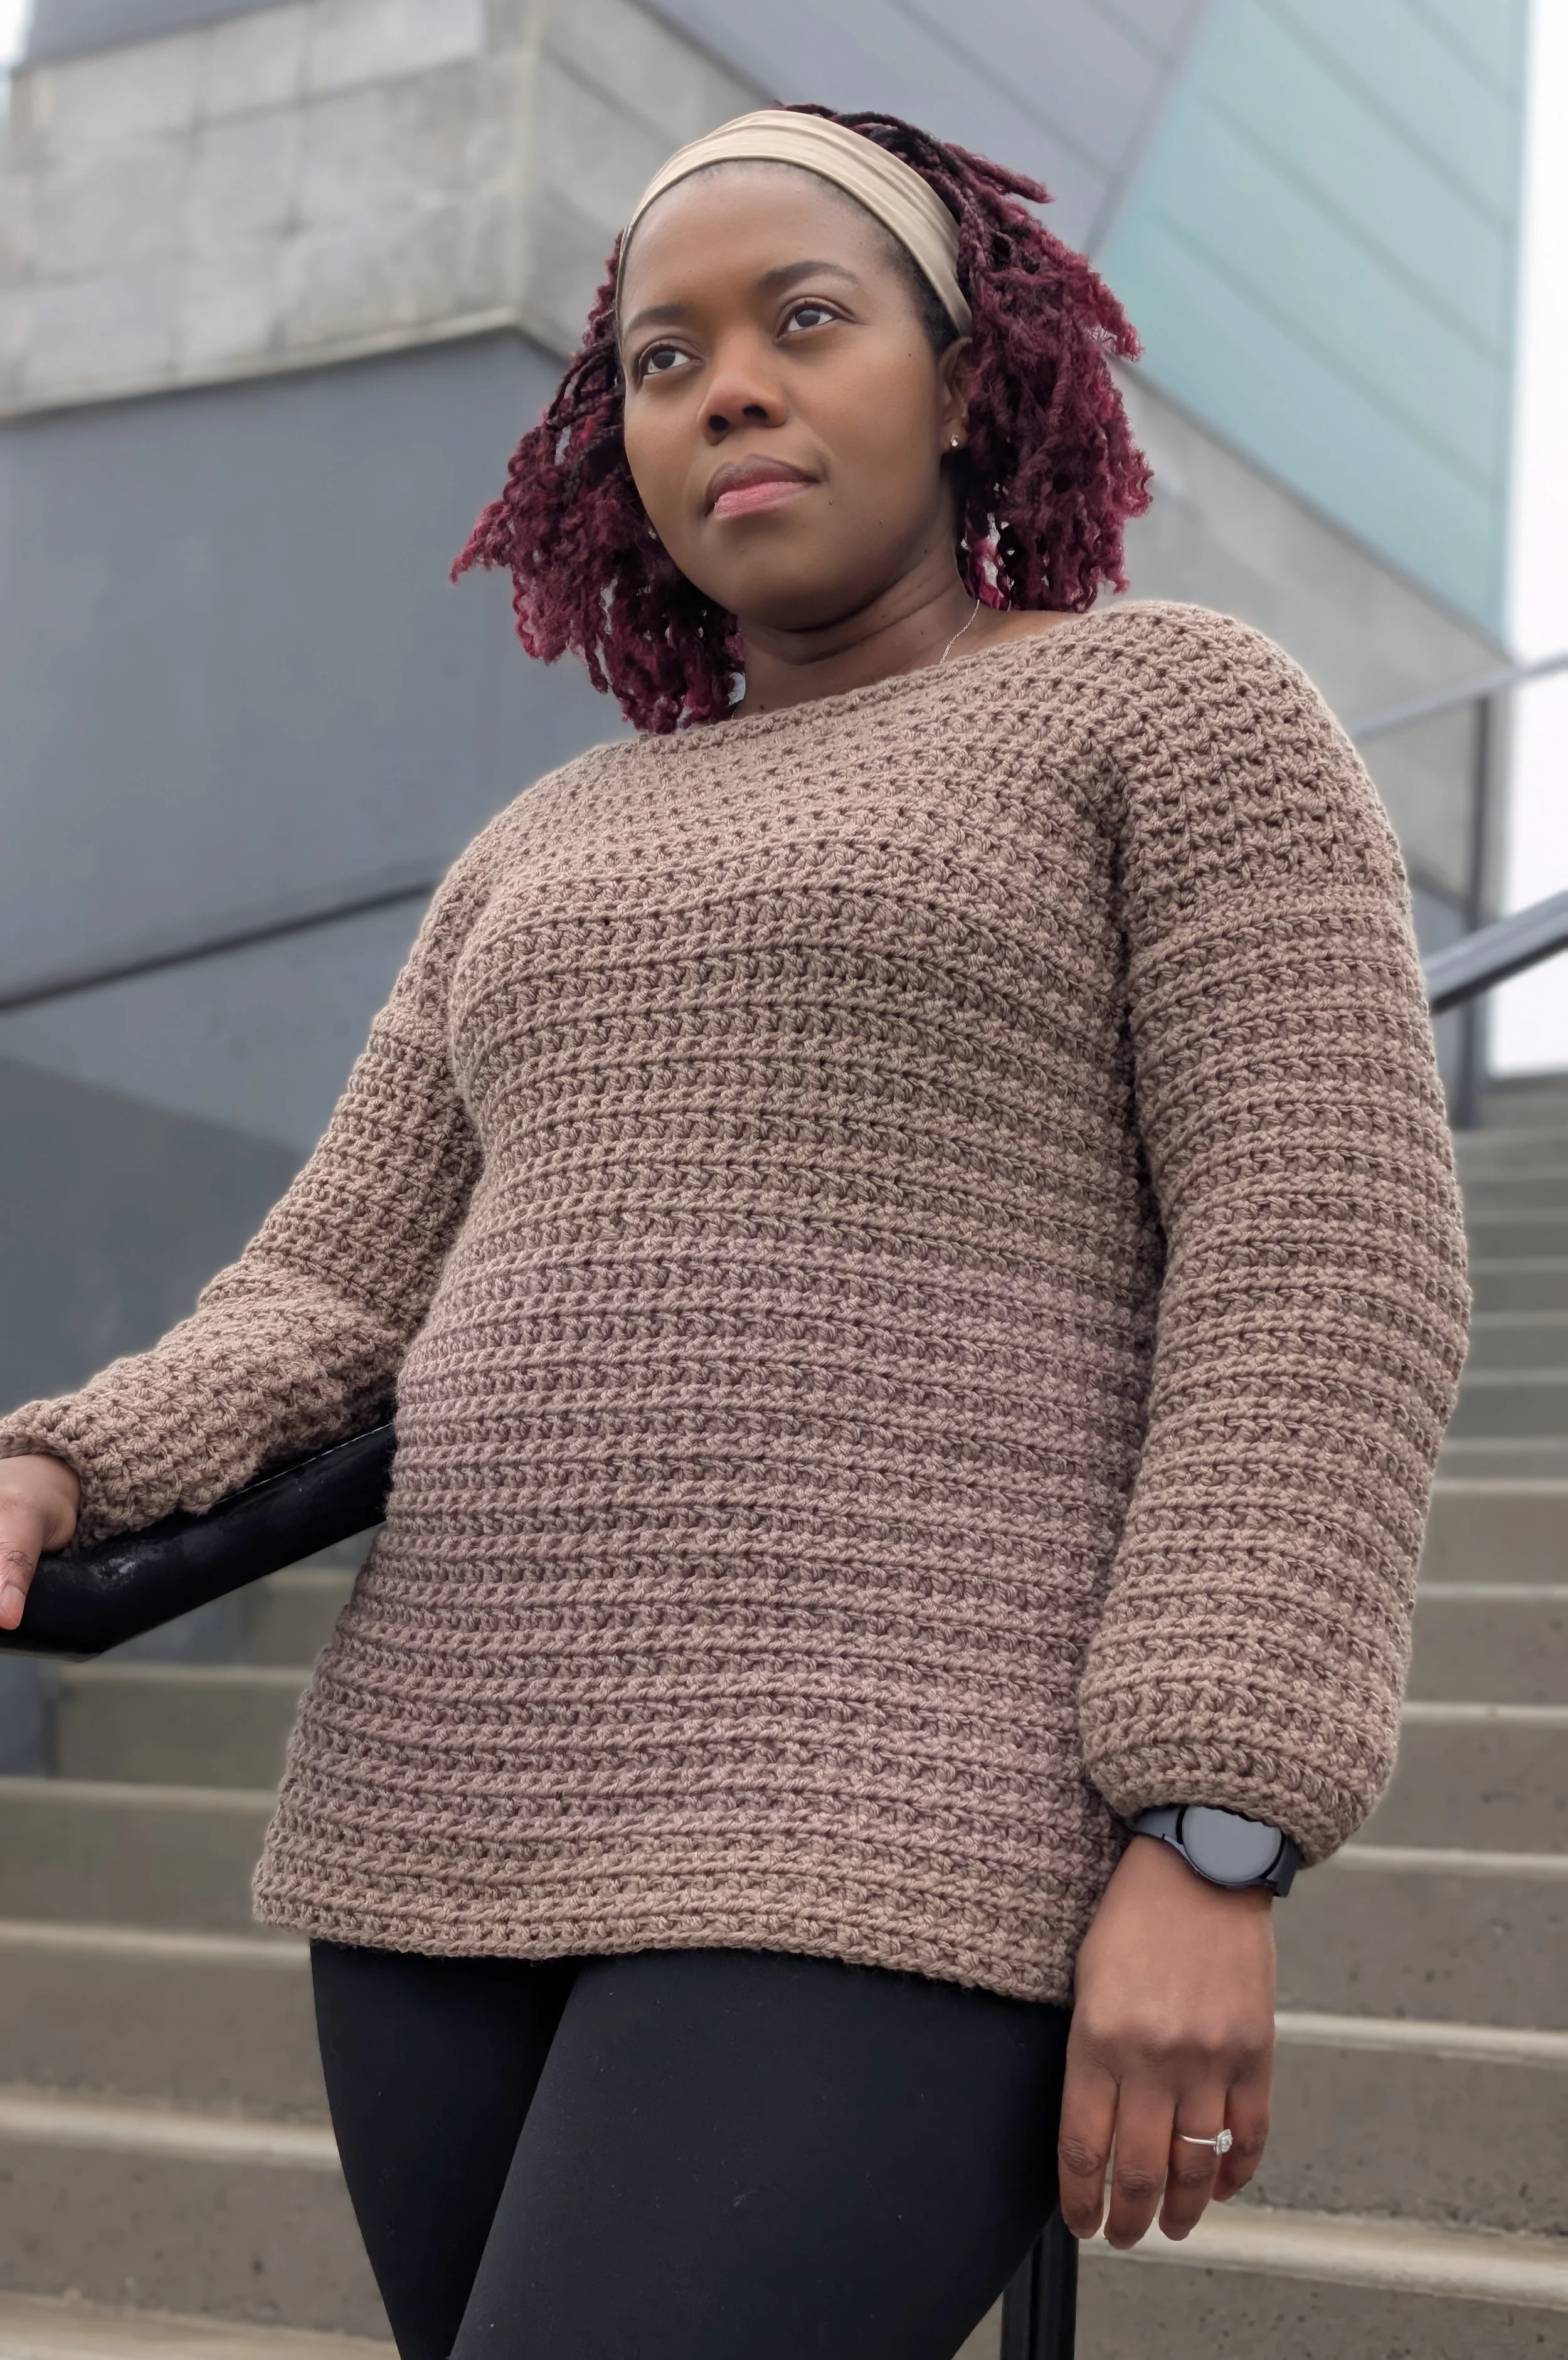


The pattern comes in sizes XS to 3XL and the fit is perfect for everyone and I have a visual for you!!
LEVEL
Intermediate
MATERIALS
6mm hook
4mm hook
Measuring tape
Locking stitch markers
Chunky weight yarn, Feels like a Dream. 207yd/190m.3.5oz/100g. 100 Nylon
GAUGE
10 rows by 14 sts= 4 X 4 “/10 X 10cm
YARDAGE
1045,1235,1350, 1425,1520,1615,1710m
1143, 1351, 1476, 1558, 1662, 1766, 1870yd
ABBREVIATIONS
Fhdc -foundation half double crochet
Hdc- half double crochet
Sc- single crochet
Ch- chain(s)
SM- stitch marker
St – stitch(es)
NOTES
● Pattern is written in standard US terms.
● Sizes are XS, S, (M, L, XL, 2XL, 3XL].
● The pattern is made to fit with approximately 4”/10 cm of positive ease.
· Use mattress stitch to seam everything together or a method of your choice.
Pattern
Back Panel
Fhdc 60, 67, 74, 81, 88, 95, 102. Ch 1, turn.
Row 2: hdc in the first st and each st across. (60, 67, 74, 81, 88, 95, 102) sts
Repeat row 2 until you reach rows 81, 81, 81, 81, 81, 81, 81
Front Panel
Fhdc 60, 67, 74, 81 ,88, 95, 102. Ch 1, turn.
Row 2: Row 2: hdc in the first st and each st across. (60, 67, 74, 81, 88, 95,102) sts
Repeat row 2 until you reach rows 77, 77, 77, 77, 77, 77. Ch 1, turn
Shoulder 1
Rows 78, 78, 78, 78, 78, 78: hdc in the first st and across in the next 19, 22, 25, 27, 30, 32, 34 sts. Ch 2, turn.
Rows 79, 79, 79, 79, 79, 79, 79, hdc in the first st and across.
Rep above row until rows 81, 81, 81, 81, 81, 81.
Shoulder 2
Rows 78, 78, 78, 78, 78, 78: hdc in the first st and across in the next 19, 22, 25, 27, 30, 32,34 sts. Ch 2, turn.
Rows 79, 79, 79, 79, 79, 79, 79, hdc in the first st and across.
Rep above row until rows 81, 81, 81, 81, 81, 81
Sleeves (make 2)
Fhdc 46, 49 ,53, 56, 60, 63, 63. Ch 2, turn
Row 2: hdc in the first st and across.
Row 3-34, 35, 35, 36, 36, 38, 38: repeat row 2. Ch 2, turn.
Rows 35, 36, 36, 37, 37, 39, 39: hdc in the 2st st, hdc 2tog, hdc in the next st
Rep for* to *until end of row. Ch2, turn
Rows 36, 37, 37, 38, 38, 40, 40: hdc 2tog in the first 2 st and across.
Sleeve Cuff
Switch to 4mm hook
Ch 12.
Row 1: sc in the second ch from the hook toward the panel.sl st in the first 2 sts. Turn your work (11)
Row 2: working into the sts, sc in each st across.ch 1, turn. (11)
Row 3: sc in each st across, sl st in to the next 2 sts on the panel.ch 1, turn (11)
Rep rows 2 & 3 until you reach the end of the panels. Cut yarn. Fasten off and weave in ends
SEAMING
1.Seam the front panels to the back panel along the top of each panel
2. Lay panels flat, mark the centre of the sleeve with a stitch marker and align to the shoulder seam. Seam the sleeve onto the body. Make sure you have the same number of stitches and rows for both panels.
Bottom Ribbing
(4mm hook)
Join yarn at the bottom of the front panel and ch 12
Row 1: sc into the second ch from the hook and each ch down toward the panel. Sl st into the first 2 sts on the panel, turn.
Row 2: working into the sts, sc blo in each st across. Ch 1 & turn.
Row 3: sc in each st across, sl st into the next 2 sts on the panel, turn.
Rep rows 2 & 3 until you reach the end of the panels. Leave a tail, Cut yarn and seam the ends together. fasten off and weave in ends
Hoodie
Count stitches on the neck opening and put SM to make the center. Join yarn on the left side of the SM. Have 1 stitch between the stitches.
Row 1: ch 1, hdc in the first st, and on each st around the neck to the end of the row.ch 2, turn
Row 2: hdc in the first st and across.ch2 turn
Count sts and put SM at the back of the hoodie
Row 3: hdc in the first st, hdc in each st to the SM, 2 hdc on the SM st, hdc in each st to the end of the row. Ch 2, turn
Row 4: hdc in the first st, hdc in each st to the SM, 2 hdc on the SM st, hdc in each st to the end of the row. Ch 2, turn
Row 5: hdc in the first st, hdc in each st across. Ch 2, turn,
Row 6-20. Repeat row 5 or has reached desired length
Row 21: hdc in the first st and across.ch2 turn
Rows 21-26: repeat row 21
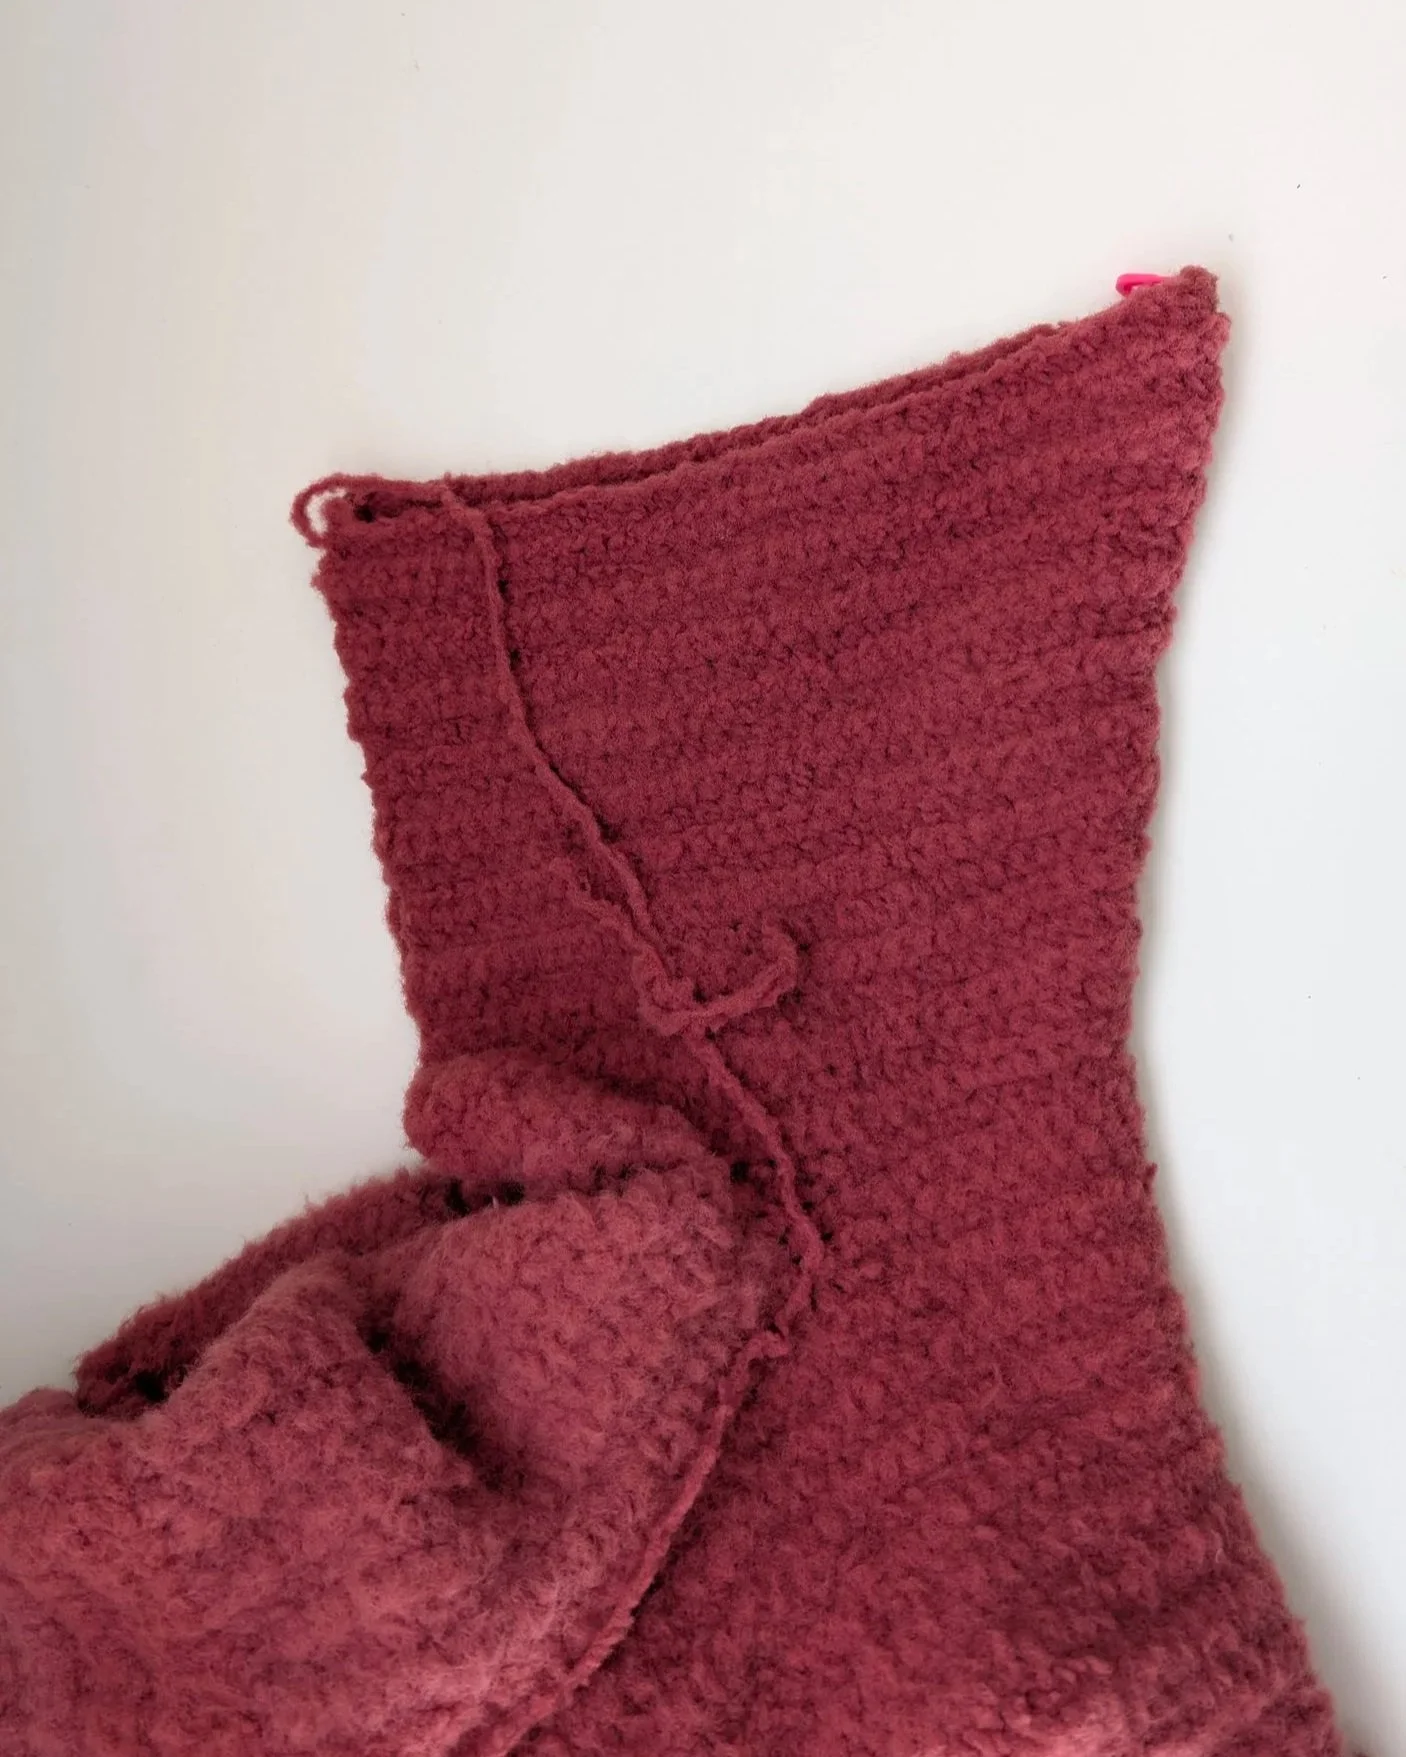
Fold the hoodie in half and join the sides to finish.
Edge
Work 2 sc on each st around the hoodie. Cut yarn and fasten off
Using 6mm hook
Fhdc 22 ch 2, turn.
Row 1: 2hdc in the first st, hdc in the next 20 sts, 2hdc in the last st. ch2, turn. (24 sts)
Row 2: 2hdc in the first st, hdc in the next 20 sts, 2hdc in the last st. ch2, turn. (26 sts)
Repeat row 2 until row 11. (44 sts) ch 2, turn
Row 12: hdc in the first st, hdc in each st across. Ch 2, turn
Rows 13-15: hdc in the first st, hdc in each st across. Cut yarn and fasten off
Assembly
Lay the sweater down and place the pocket in the middle 3 rows above the bottom ribbing. Make sure you have the same distance on either side and lift the front panel up to avoid seaming through both panels. Seam the top edge of the pocket . Cut yarn and weave in ends
Cut a long tail, join on the side below the diagonal edge, seam the side, down along the bottom and up along the straight edge. Weave in ends and cut the yarn.
Block your sweater.
VOILA!!! YOU ARE DONE. I hope you had fun making this sweater.
Here is another inspiration of a hooded sweater, this is perfect for warmer weather!!
Curated with DK weight yarn, this shawl uses basic crochet stitches. Acrylic Cotton blend with an amazing stitch definition. The Cotton characteristic gives she shawl a cooling effect yet providing a shawl or scarf comfort.
One size only but can be easy made bigger than the instructions.
MATERIALS
4mm hook
scissors
DK weight yarn - 560m.567yd